It took me a while, but I have finally done my diaper cover tutorial! I bought a pattern for diaper covers, but they didn’t turn out right. I think the pattern was for cloth diapers or something, because they turned out HUGE! Since then, I have been working on modifying that pattern to create one that will work over disposable diapers. I finally got the pattern all drawn up, and my wonderful husband spent some time making it look beautiful. So, now I have a pattern I can share with all of you! Exciting isn’t it 🙂
Now, I’m not very computer savvy, but here’s the easiest way I could think to do this. All you have to do is click on the patterns below, save them to your computer (right click, and then click save image as), and then print them! That simple!(If anyone has any issues getting them to print, leave me a comment and I’ll email them to you!)


Alright, now that you have your patterns printed, let’s make some diaper covers!
Supplies:
1/4yard- 1/2 yard fabric, 1/2″ elastic, 1/4″ elastic, scissors, sewing machine
Note: To get elastic measurements, measure around waist and add 1 inch. For leg holes, measure around top of leg and add one inch.

Cut the pattern down to the size you want to make

Fold your fabric in half, and place pattern on fabric- along the fold- as directed on pattern. You can pin pattern in place or trace around it.

Cut along lines. Unfold, and here's what we get!

With right sides of the fabric facing each other, pin the sides and crotch

Sew along sides and crotch. Be sure to either serge (if you're lucky enough to have a serger!!), or us a zigzag stitch on the edge to avoid fraying!

Now, press up edge of the leg holes 1/4"

Then fold and press another 1/2"

Fold and press the top edge 1/4"

Then fold and press again, about 3/4"

Sew the top and leg holes- leaving an opening to thread elastic into

The leg holes can be a bit tricky because of their shape. Be patient, and don't worry too much about flaws, they won't really show

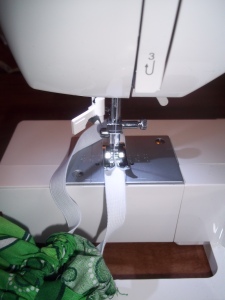
Using 1/2" elastic for the top and 1/4" elastic for the leg holes, guide elastic through the opening- using a safety pin to help you.

Once you have pulled it through the entire casing, overlap elastic 1" and sew using a zigzag stitch. Sew the openings for elastic shut. Do the same for leg holes

The finished product!

I threw together a few more pairs 🙂 I ran out of elastic for my leg holes, and instead used bias tape on a couple pairs. That works well too, if you'd rather!


